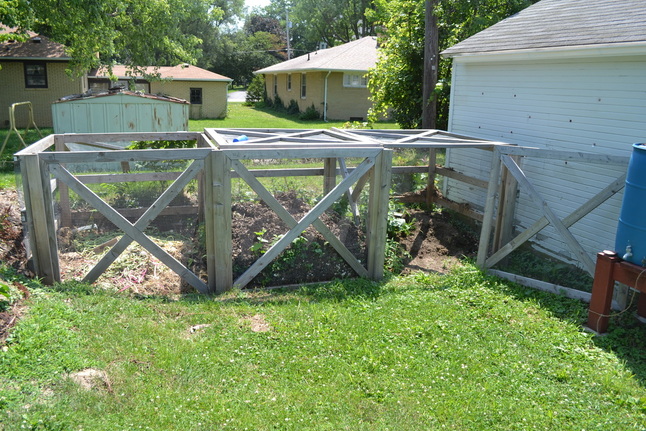
3-Stage Compost Bins
Our Bins are roughly 4'x4'x4' each. We start all fresh composting material in the left bin, and every 4-6 weeks we turn the contents into the next bin. The tops of the bins are on hinges to allow easy access and the fronts slide out to let us turn it eaiser. Our organic matter for the compost comes from the garden house, the Monmouth College Cafeteria, and nearby professors. The middle bin also has a large population of red worms to help speed up the process! By the time the compost reaches the right bin it is great dirt to use in new beds, organic fertilizer for some plants, and of course we use it to make "compost tea" to water new plants. As you can see the picture, the 3rd bin is so rich that all of the seeds left in the compost from the old produce sprout, giving us healthy volunteers to transplant or compost in the 1st bin!
Follow this link to see the basics of building your own compost bins and what you can/can't compost. DIY Projects: Compost Bins
Follow this link to see the basics of building your own compost bins and what you can/can't compost. DIY Projects: Compost Bins
Solar Dehydrator
So what is a solar dehydrator anyways? Well, to put it plainly, it is a food dryer. Will Terrill and George Burnette built Helios (as it has been dubbed) in the summer of 2011 to dry tomatos, zucchini, and other garden fruits and vegetables as an alternative method of storage. Helios works through the process of heat convection. It has vents in the top of the cabinet and the bottom of the window panel to let air move through. Heats rises, so as it heats up in the window panel it travels into the cabinet on top where up to ten 2'x3' screen racks can be placed. As this hot air passes through these racks it pulls moisture out and gets vented through the top. When this hot air leaves the top more cool air from outside is pulled into the window panel to be heated up and continue the process. Our top vents are adjustable and we have found that it works best to leave them fully open because if the cabinet gets too hot it will cook whatever is in it instead of drying it out. On a 90 degree (F) day we have been able to dry racks of sliced apples in under 8 hours!
Follow this link to see how to build your own *smaller* reclaimed window solar dehydrator, DIY Project: Solar Dehydrator
Follow this link to see how to build your own *smaller* reclaimed window solar dehydrator, DIY Project: Solar Dehydrator
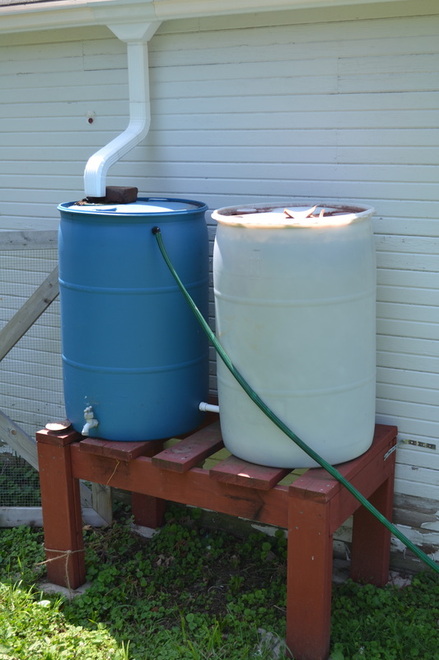
Garage Rain Barrels
Our garage rain barrels consist of two 55-gallon plastic drums with fittings at the bottom to link them together and a faucet off one that a hose can be hooked up to. The gutter has been diverted into a screened hole on the top of the barrel, and the green hole mounted near the top end is an overflow hose leading out into the grass for heavy rains. With the wooden stand, these were very easy to build and are very beneficial to our watering needs. If you need to attain a certain PSI, just remember that for every 1' in height, add 0.43 PSI (pounds per square inch.)
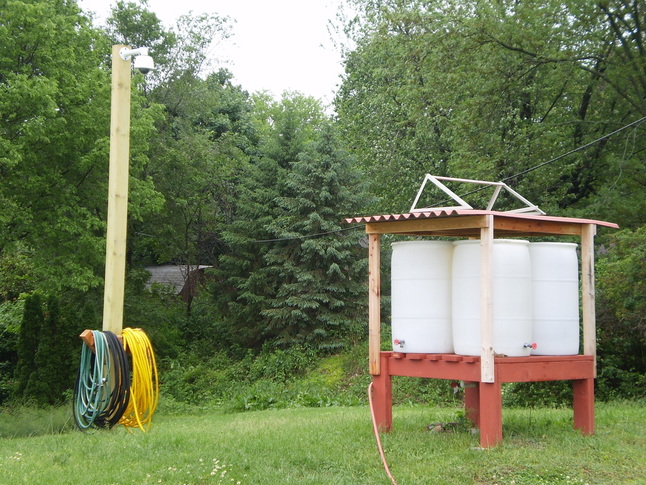
High-Point Rain Barrels
Our high-point rain barrels are dubbed as such because they are located on the highest point in the garden! Consisting of four 55-gallon plastic drums fit together with common plumbing parts and spickets, we can water everything in the garden from these barrels only using gravity as our source of water pressure.
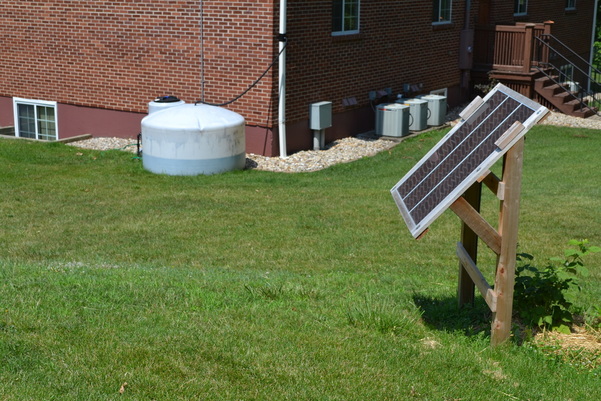
Rain Collection Tank and Solar-Powered Pump
This is our 550-gallon tank off the side of one of the campus apartment buildings by the garden. The water is diverted from one of the gutters from the roof to fill up the tank. The water is then pumped up to our high point rain barrels with the use of a small electric pump hooked up to a car battery that is kept charged by a 3-cell solar panel mounted nearby.
Greenhouse
Our NEW greenhouse is 8'x18' and is located on the South side of one of our garages. The three walls are built from reclaimed windows found around Monmouth and the roof is 8mm twin-wall polycarbonate, a standard greenhouse material. This student designed/built greenhouse will be used to start seedlings on-site and hopefully extend our growing season for herbs and greens to 10-11 months out of the year. We are very excited to put it to use and see what it is capable of doing!
Cedar Raised Beds
This year we have built three cedar raised beds in the garden. They are 3'x12'x12" and are tiered on a hill. We opted to use raised beds here because Monmouth's soil has a lot of clay and we needed a place to grow root crops like carrots, beets, onions, and leeks. We mixed 1/3 peat moss, 1/3 sand, and 1/3 compost to make a rich, loose, wet soil that the root crops should thrive in.
Lattice Grape Arbor
Our grape arbor was built in the Spring of 2011 by some students from the college. Designed like a pergola, the six grapes and two clematis are being trained to cover the lattice walls and climb up over the top so the students living in the garden house have a shady place outside to work and study. On the East side, Professor Brad Sturgeon showcases some of his prized hop plants every year that climb coconut fiber rope on the open side of the arbor.
Trellises
Every summer Garden Crew grows different varieties of cucumbers and beans that like to climb. Our recent projects included installation of creative trellises made out of honey suckle branches, fencing and many more. Check out some of our creations.
Honey and Jams
Our Garden Crew is putting all of our berries and bee hives to good use - we make jams and harvest raw honey! Strawberry, Raspberry and Blueberry jams have become a favorite treat across Monmouth College faculty and staff as well as community members. We process our berries in the CSB Nutrition Lab. The beautiful jam labels are creations of art students at Monmouth that were inspired by the artist Seito Jones. Honey labels are designed by Olivia Howey.
