Helios - The Solar Dehydrator
A solar dehydrator is used to remove the moisture from fruits and vegetables, acting as an alternative way to store produce like carrots, zucchini, tomatoes, eggplant, and more! Dried produce is great for snacking on the go, or rehydrating to use in soups and other dishes. Dried eggplant has the interesting ability to be used like lasagna noodles!
So basically, solar dehydrators are made of 2 parts, the sun-catcher, and the cabinet. The sun-catcher is the glass covered box that catches the sunlight and heats up. The cabinet sits on top of the sun-catcher and the vents where they connect allow for the hot air to rise through the cabinet, and out the top, removing moisture in the process. Fresh is is drawn into the sun-catcher through a vent in the bottom.
We "winged it" when we built our solar dehydrator, but here are some smaller versions good for home use!
Solar Dehydrator by Life Skills International
Solar Dehydrators and Cookers
When you stop by the garden, we would be happy to show you first hand how our solar dehydrator was built and how it operates!
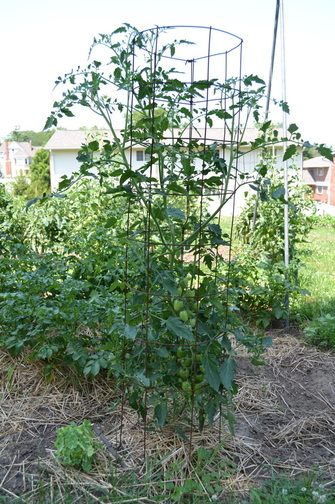
Tomato Cages
We've found that tomato cages you can buy at the local garden center are not up to the task of supporting our indeterminate tomato plants, so naturally we opted to make our own. Here's a 4-Step Guide to making cages like ours.
Things you'll need: Pliers, Rolled Fence, Work Gloves, Large Wire Cutters, Patience, Strong Hands
1. Pick up a roll of fencing from your local hardware store, we used a 50'x5' roll with 4"x4" holes (6"x6" would work too, you just need to be able to reach in for tomatoes!)
2. Our cages are roughly 5'x15"; to do this you'll need to cut the fencing into lengths of 50" (this will make 12 cages.) Use the wire cutters to cut the fencing, but be careful because it can be springy and sharp.
3. Bend each 50" section of fencing into a tall tube and wrap the cut ends around the other edge to fasten the ends of the fencing together.
4. Once you have the fence tube, cut the ring off one end of the tube so it has stakes to stick in the ground (If you're garden is in a windy area you might cut off the bottom 2 rings for added stake support.)
We grow many different types of tomatoes, and with mild pruning the tomatoes fill out these cages like its their job.
Reclaimed-window Greenhouse
Below you can see a step-by-step picture guide to our new greenhouse. We will be using it to hopefully grow greens/lettuces/spinach year round and start our seedblocks in February. We contacted a local construction company and went to a site where a house was being remodeled and for free they gave us 10 double pane sliding windows. To figure out the walls of the greenhouse we added the lengths of the windows and the widths of joists between them for structural support. Once we had the dimensions of our walls we used shovels and a plow to tear up the grass and dig out an area to lay the 'floating' foundation. By floating we mean that it is not set in concrete, but instead uses sand and gravel like a retaining wall. This will allow us to move or take down the greenhouse with relative ease, if needed. Once the foundation was set we framed the windows into a wall and lifted it into place, anchoring it to the cinderblocks
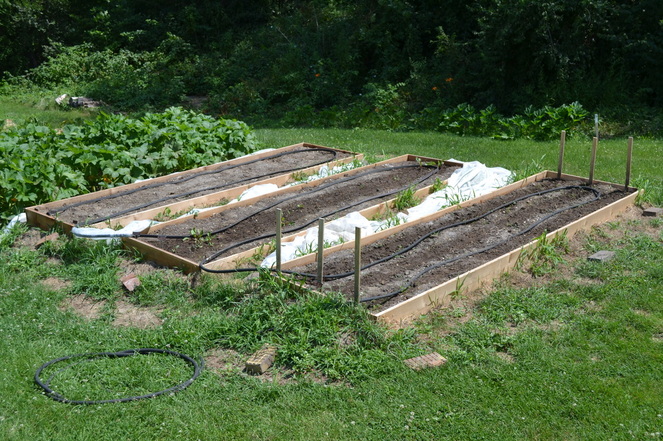
Raised Beds
Raised beds are a cheap, attractive, and excellent way to utilize areas of your garden than have poor soil or on hills! We used cedar to build our terraced beds so they would last a long time without having to risk putting toxic chemicals like paint or stains into the soil. These beds measure 3'x12'x10" and are on a hill where the soil is 90% clay.
1. Decide where you want a raised bed! Hills and areas with poor soil are great options.
2. Build a frame to the dimensions of your space, we would recommend leaving enough space between beds to mow, otherwise the grass can overtake your raised beds. Cinder blocks can also be used instead of wood if you have them laying around, plus, you can then plant in the holes of the blocks too.
3. Level out the area where the raised bed is going, this can involve digging out weeds, grass and dirt or adding dirt to build the soil level up.
4. Once the bed is level, place your frame down and begin to fill it with peat moss, topsoil, and some sand.
5. You should aim for at least 8 inches of the peat, topsoil and sand mixture to allow for good root growth.
6. Plant vegetables that like well drained soil!
Notes: Raised beds can be notoriously hard to keep moist in hot weather, this can happen when there is too much sand and not enough peat. They also seem to work better when seedlings are transplanted into the raised beds instead of using direct seeding methods.
Rain Garden
Rain gardens are beautiful, especially when using native flowers and grasses. Using native plants is great because they are already accustomed to the area, and are made to withstand your area's rainfall or lack thereof. Our is located alongside the low part of the garden house, so there is a natural trench that sends heavy rainwater right to the garden. The main difference between the rain garden and other flower gardens are that they are meant to be near zero maintenance (since your weeds are probably native too!) Rain gardens are also great because they hold water. Underneath a foot of topsoil and compost there is a foot of sand, and in our heavy clay soil, this really creates a nice basin for water to store in where the plants need it most.
So here's a short how-to to get you started on your own rain garden.
1. Choose a location where rainwater naturally flows, in low areas where building gutters drain and at the bottoms of hill work great.
2. Dig a basin 2' deep for the size of a rain garden you plan to make.
3. Fill the basin with 8-12" of sand. Make sure it is a "clean" sand and won't poison your soil with any harsh salts or other chemicals.
4. Backfill topsoil to fill the basin back to ground level, it helps to make the garden level when on hills by using the extra dirt to build a berm.
5. Plant native flowers and grasses.
6. Enjoy your new (nearly) maintenence free rain garden!
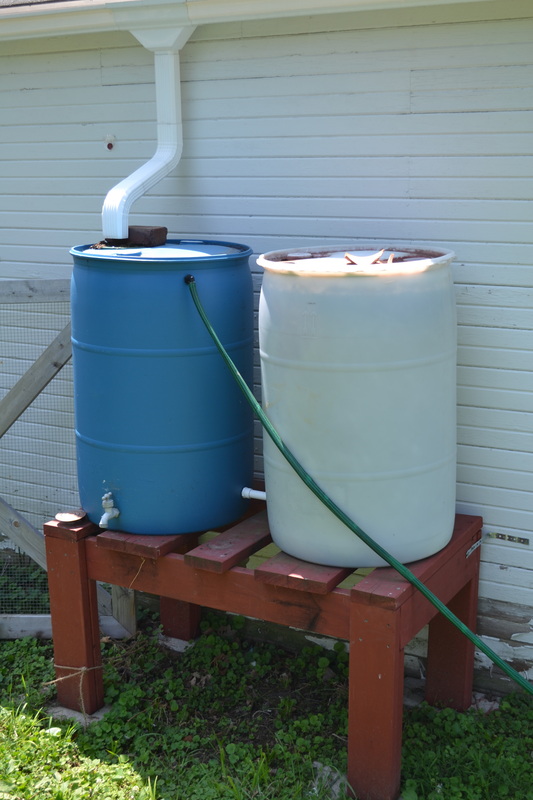
Simple Rainwater Collection System
Our rain barrels catch diverted water off one side of a garage. To do this, simply reroute your downspout into a 55 gallon drum with a faucet attached or store bought rain barrel that is lifted onto a stand. Hook up a hose or have a watering can nearby and you'll be watering in no time. Note - The higher the rain barrel, the higher the pressure.
Solar-powered Water Pump
Our largest rain barrel is 550 gallons and collects water off one of the campus apartment buildings. It is attached to a water pump that we use to pump this water up to our high point water barrels. The pump is operated by a weatherproof switchbox and the electricity comes from a car battery that is kept charged from the constant trickle of energy from our small solar panel system.
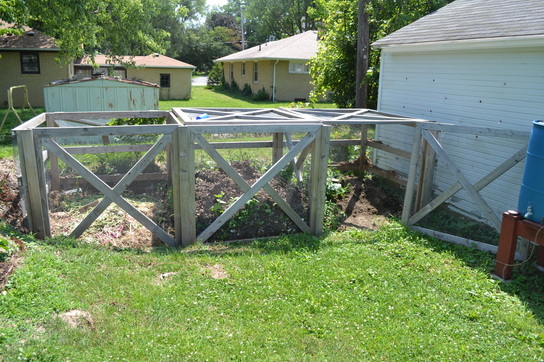
3-stage Compost Bins
Here is a great how-to on building a similar compost system!
3-Stage Compost Bins
3-Stage Compost Bins